2. Quick start
2.1. I don’t have FRCap
If you don’t currently have an FRCap, you can quickly create one in this section.
First, we need to connect to the robot and access the WebApp, open a browser on the local computer and enter the robot’s default IP address (http://192.168.58.2) and log in to the WebApp.
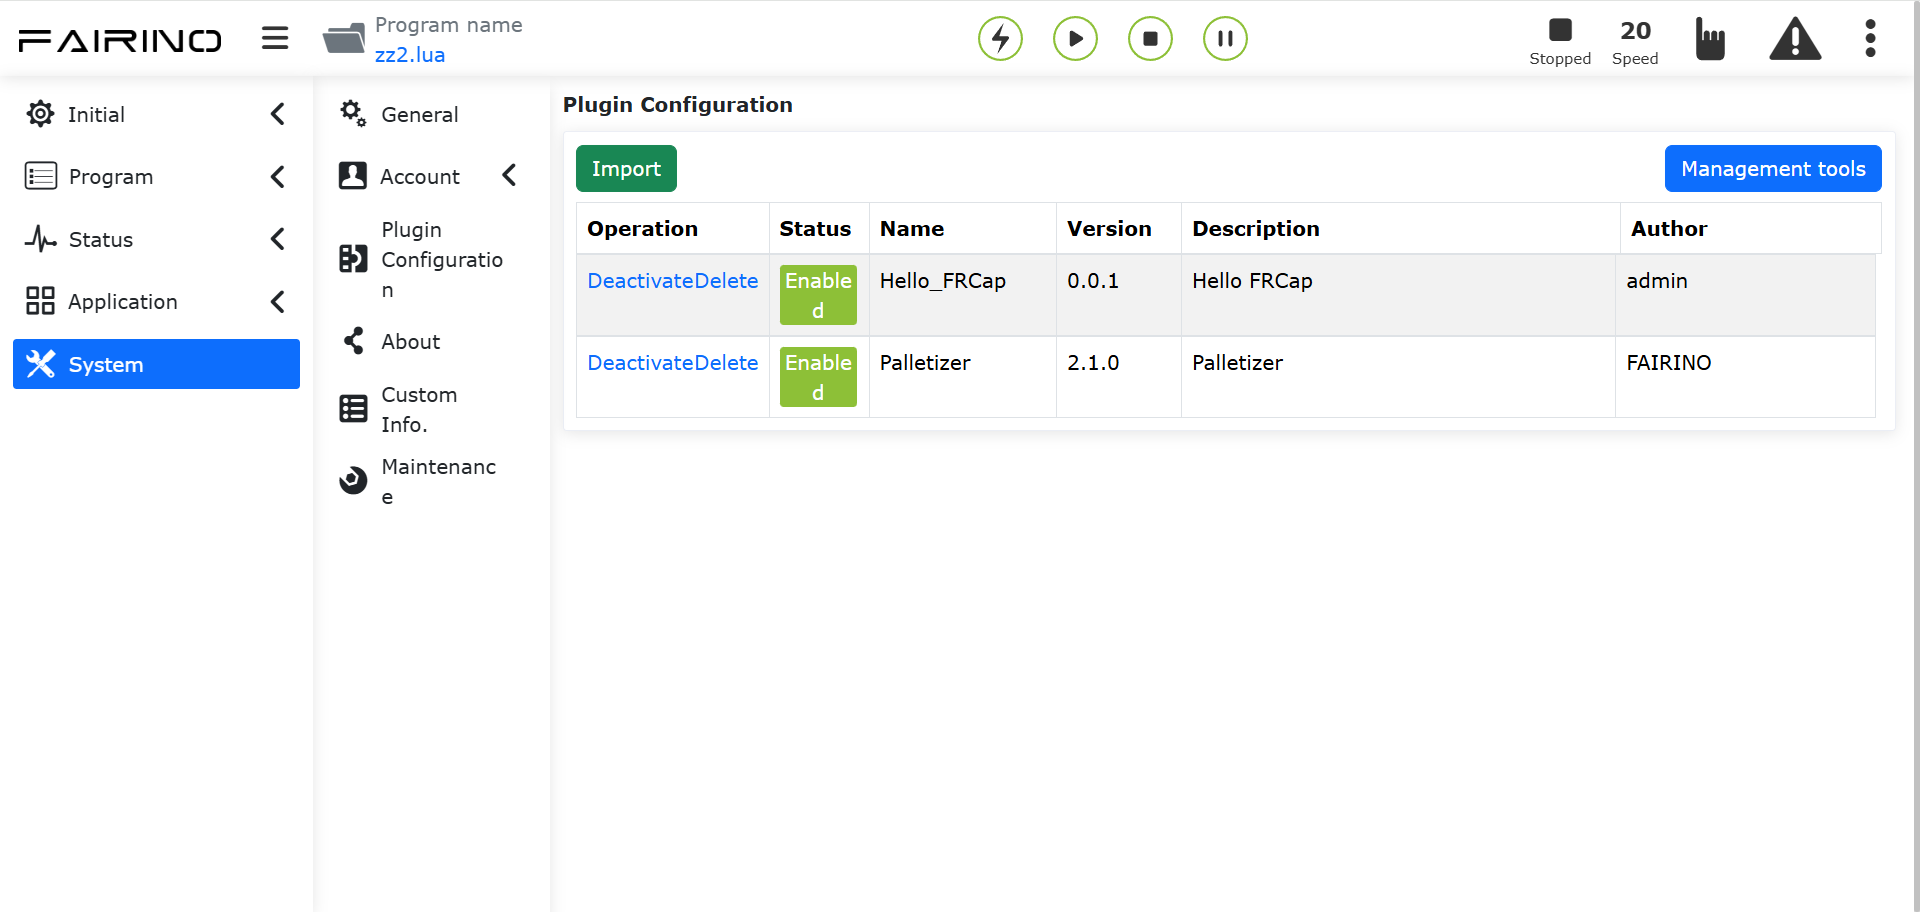
Figure 2-1 “FRCap Management” page of WebApp
In WebApp, a new tab will open in the browser and access the “FRCap Management Tools”.
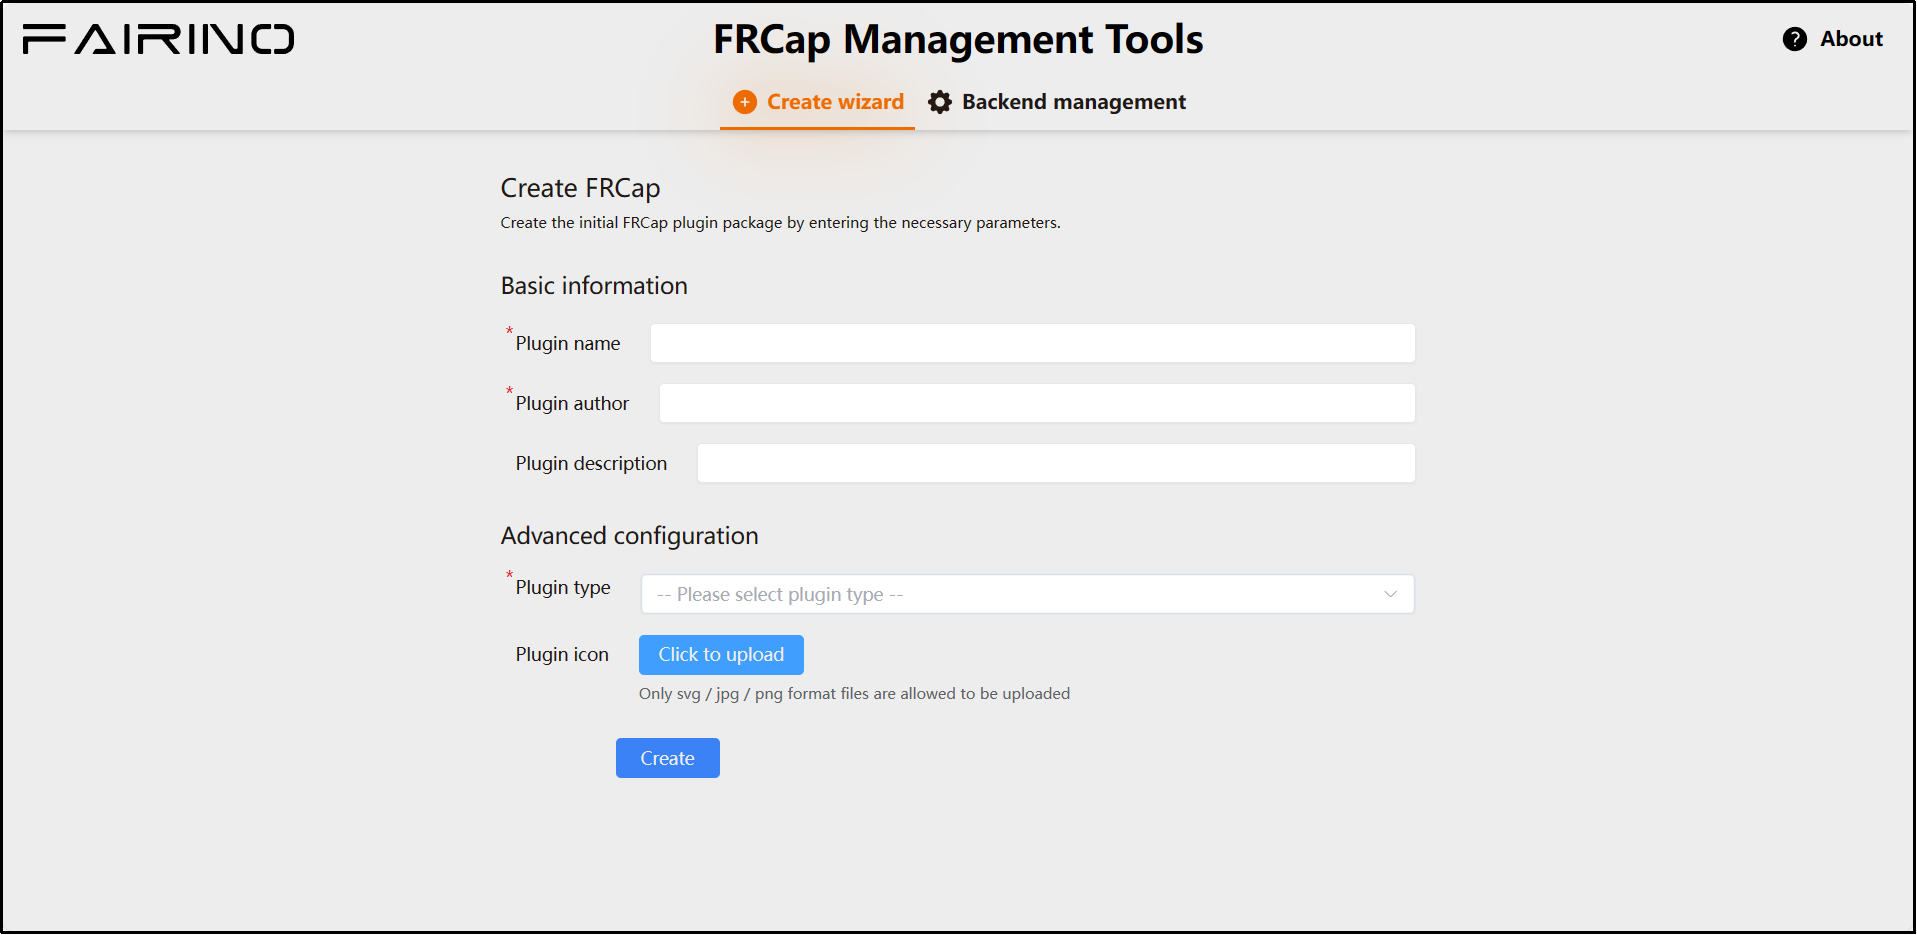
Figure 2-2 FRCap management tool
In the FRCap management tools, and enter or select the following plug-in content:
Plug-in name: Hello_FRCap.
Plug-in author: admin.
Plug-in description: Hello FRCap.
Plug-in type: Configuration.
In this section, There is no need to upload the plug-in icon. After entering or selecting parameters, click “Create” to complete the creation of FRCap.
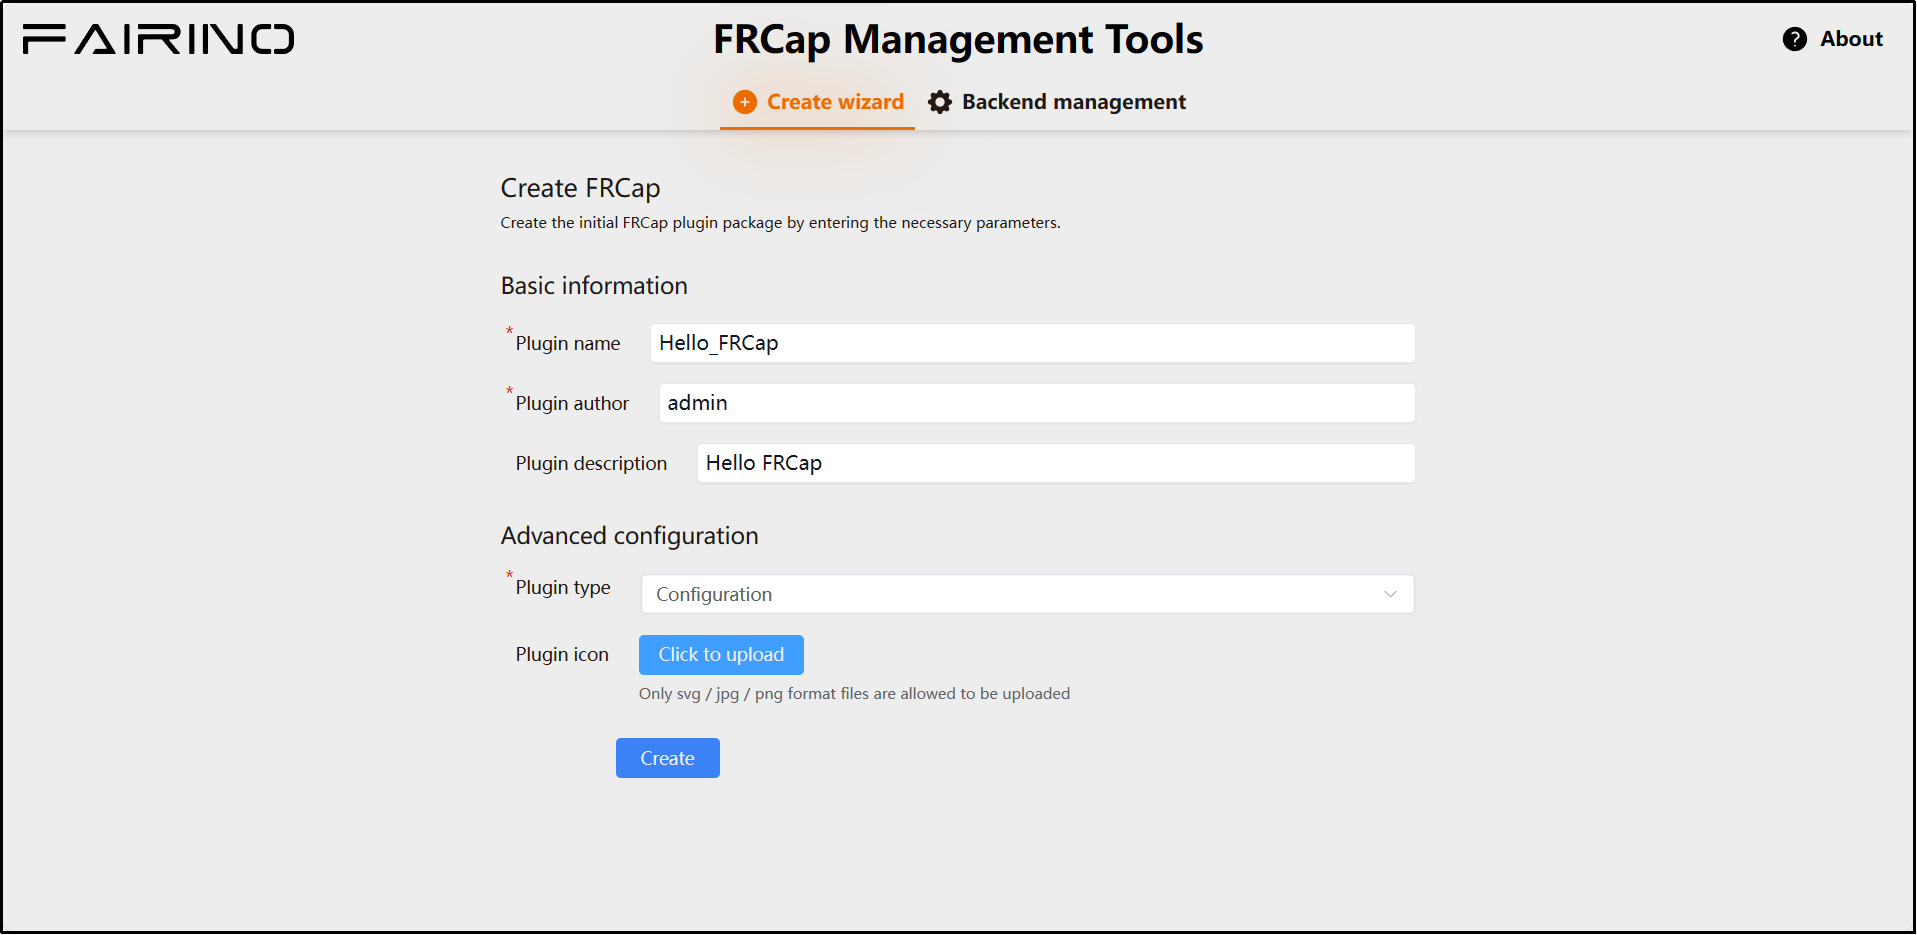
Figure 2-3 FRCap creation wizard
After the creation is successful, jump to the creation success page and display the name of the currently successfully created FRCap. Click “Download” to download the created FRCap to the local computer.
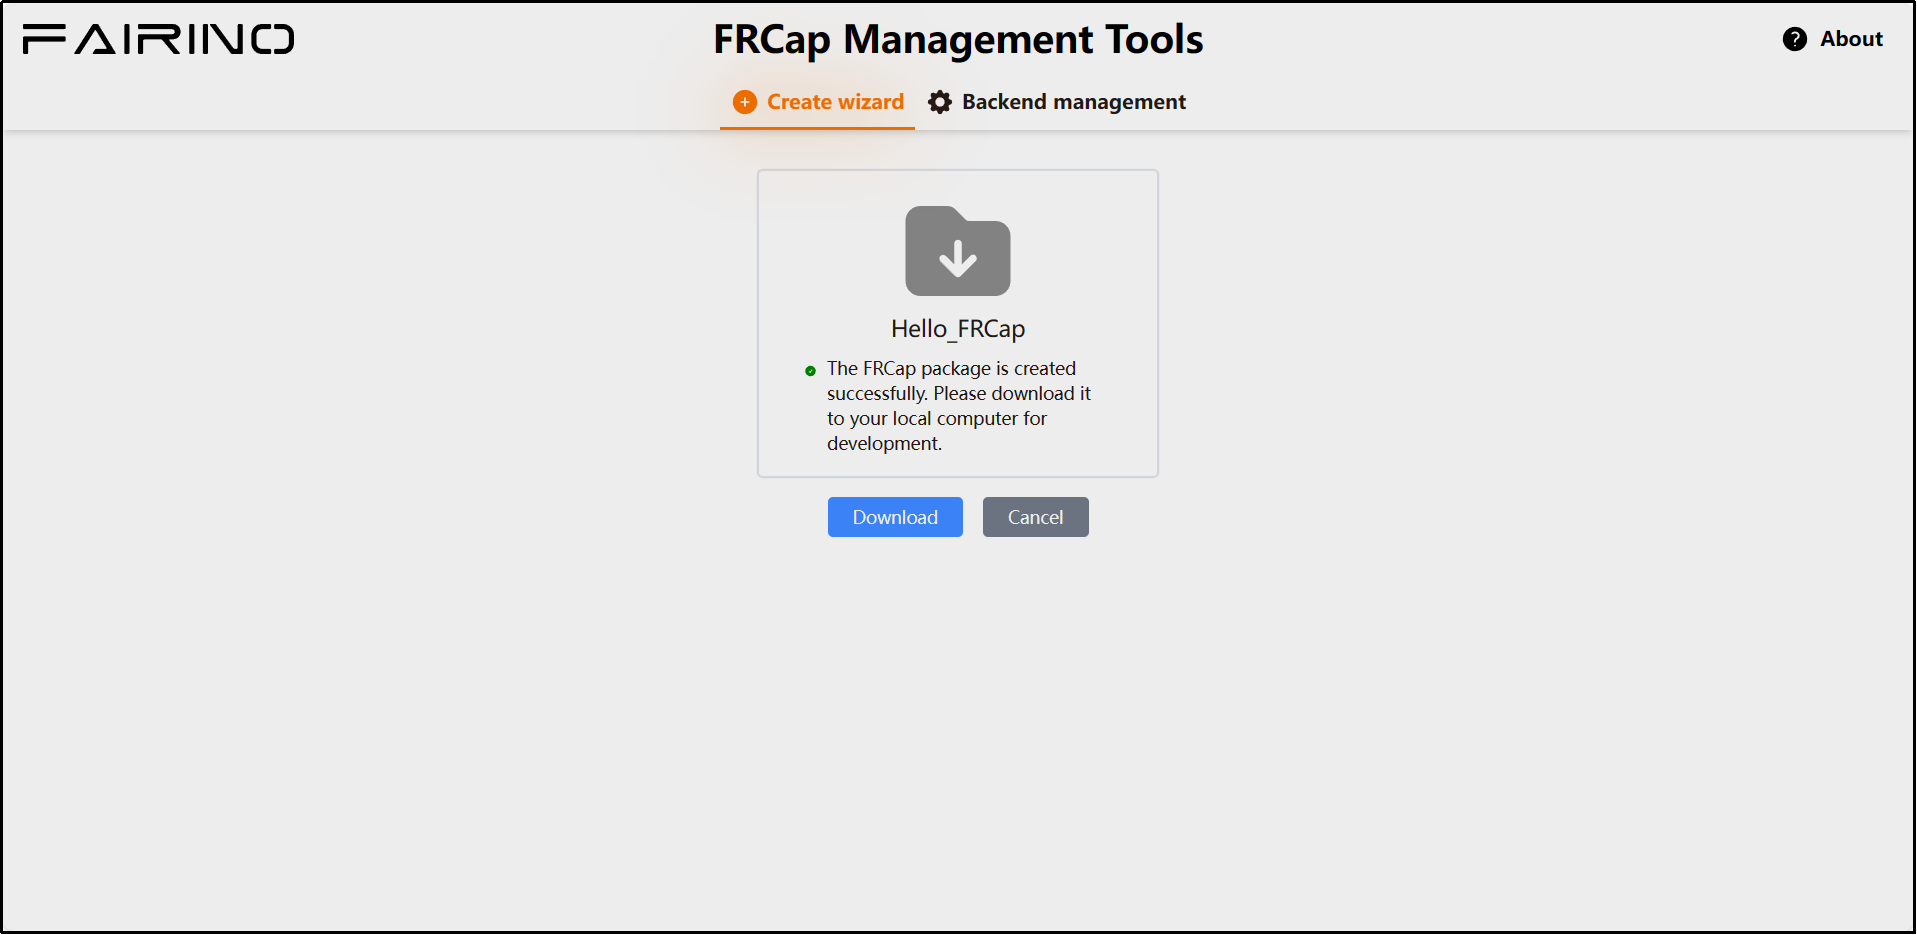
Figure 2-4 Download the Hello FRCap plug-in package
2.2. I already have FRCap
If you already have an FRCap project folder and it conforms to the FRCap project structure , please read Build FRCap directly FRCap directly.
If you already have a complete plug-in package with the file extension name “.plugin”, please read Hello FRCap.
2.3. Build FRCap
If you already have a complete plug-in package with the file extension name “.plugin”, please read Hello FRCap directly.
Depending on the system you are currently using, first open the build script, modify the buildName parameter to the name you want, then save and close, and execute the corresponding script in the terminal.
Start the terminal in Windows and run the following commands:
1./build.bat
Start a terminal in Linux and run the following commands:
1./build.sh
After the build is completed, a package file with the file name FRCap and the file suffix “. frcap ” is generated in the FRCap project directory.
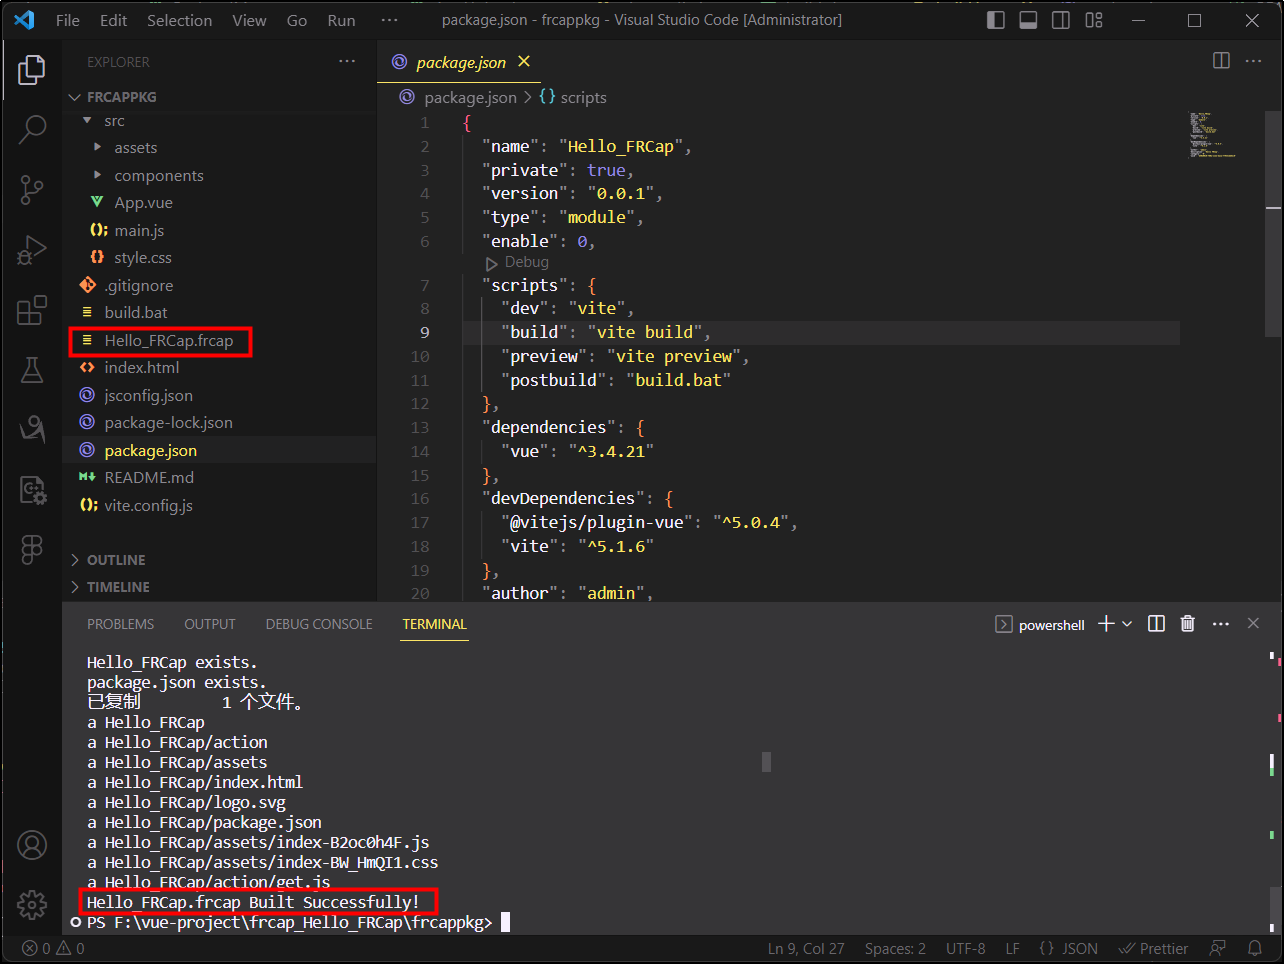
Figure 2-5 The completed FRCap package file
2.4. Hello FRCap
After the FRCap project is built, open a browser on your local computer and enter the robot’s default IP address (http://192.168.58.2) and log in to the WebApp, click “System Settings” -> “FRCap Management” -> “Import” . Select the built FRCap package file with the “. frcap ” suffix , open it and upload it. After the upload is successful, the imported FRCap information will be displayed in the plug-in information list below.
Use the operation bar in the list to control whether FRCap is enabled and deleted, and check the enablement status of FRCap in the start/stop status bar.
After Hello FRCap is enabled, it can be used in “Auxiliary Applications”-> “FRCap” -> “Hello FRCap”. This page carries the configuration class FRCap , which can be full-width or half-width. By default, it is displayed in half-width.
At this point, you have completed the entire plug-in quick creation and usage process.
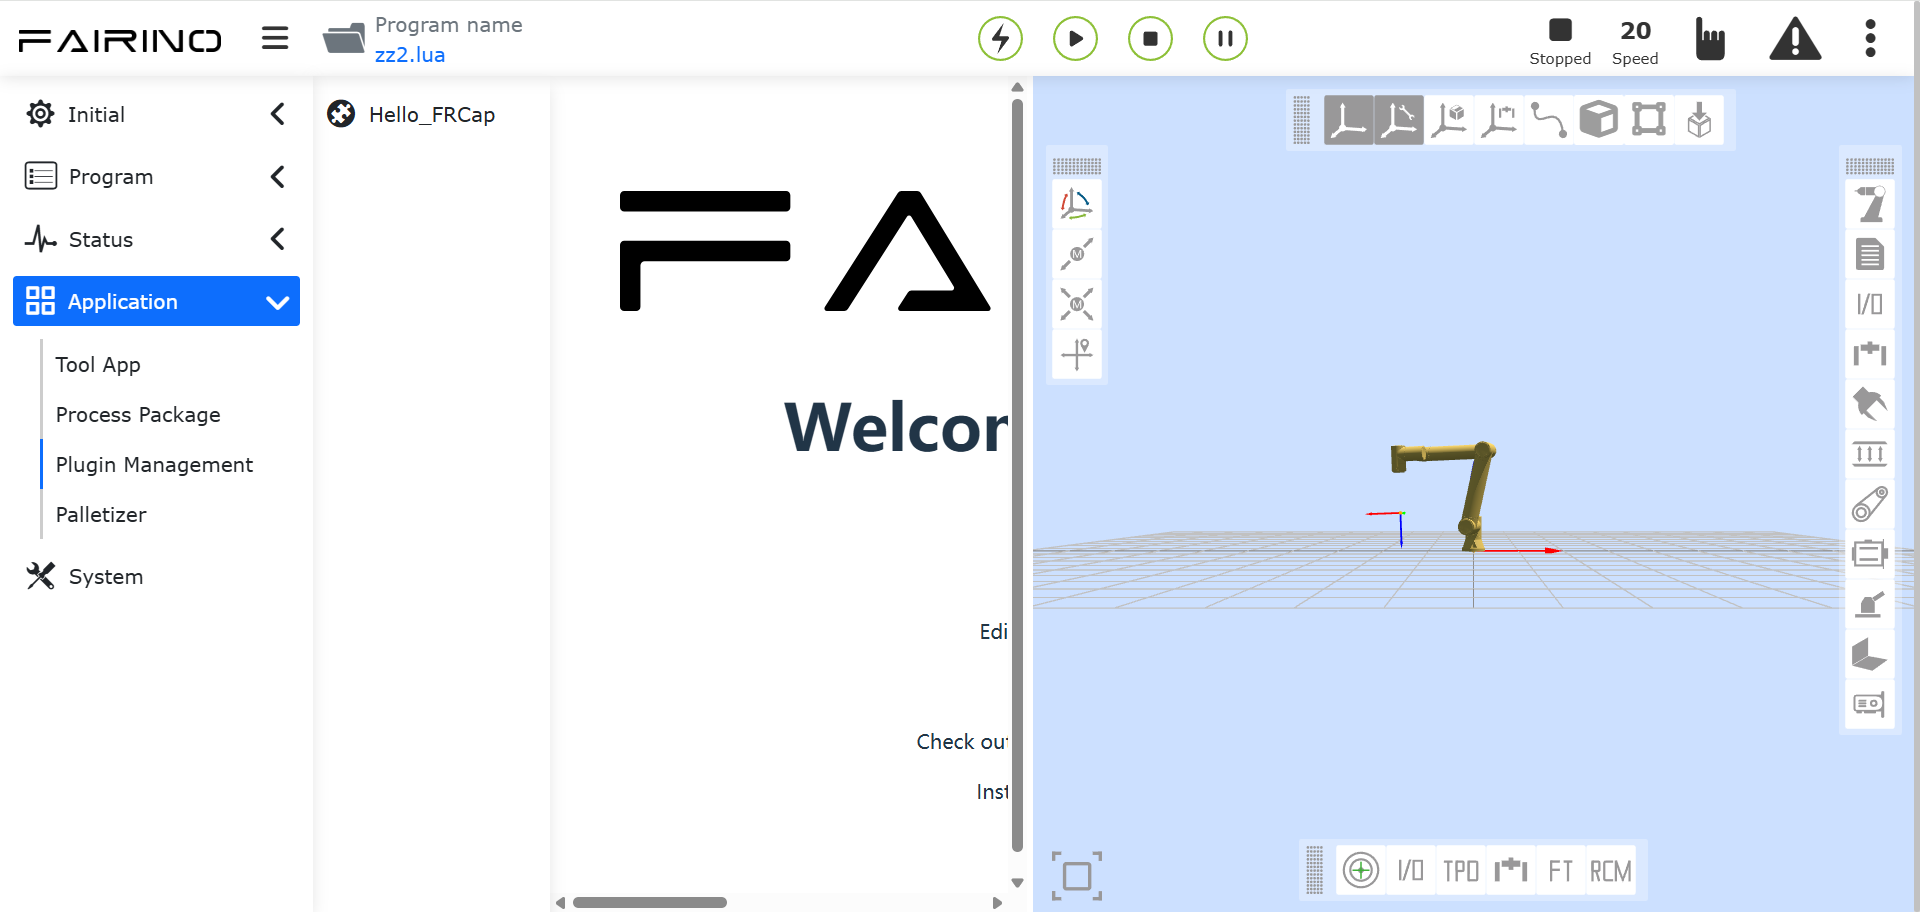
Figure 2-6 Hello FRCap content
If you want to know the detailed creation wizard guidance, you can continue to view the creation wizard.
To learn about the tool environment and guidance required to develop FRCap, please view the Development Guide.
For specific guidance on using FRCap in WebApp, please see Using FRCap in WebApp.