12. Teaching Points
Teaching management is divided into two modes: “System Mode” and “Point Table Mode”. When calling the manipulator program, different inspection schemes can be achieved by calling different point tables, fulfilling recipe requirements. For each additional device or product subsequently, the point table data package can be downloaded to the robot via the host computer. Point table data packages newly created by the robot can also be uploaded to the host computer.
System Mode: Supports “importing, exporting, deleting, renaming, modifying, overwriting, modifying, viewing” teaching point content, as well as single-step movement to teaching points.
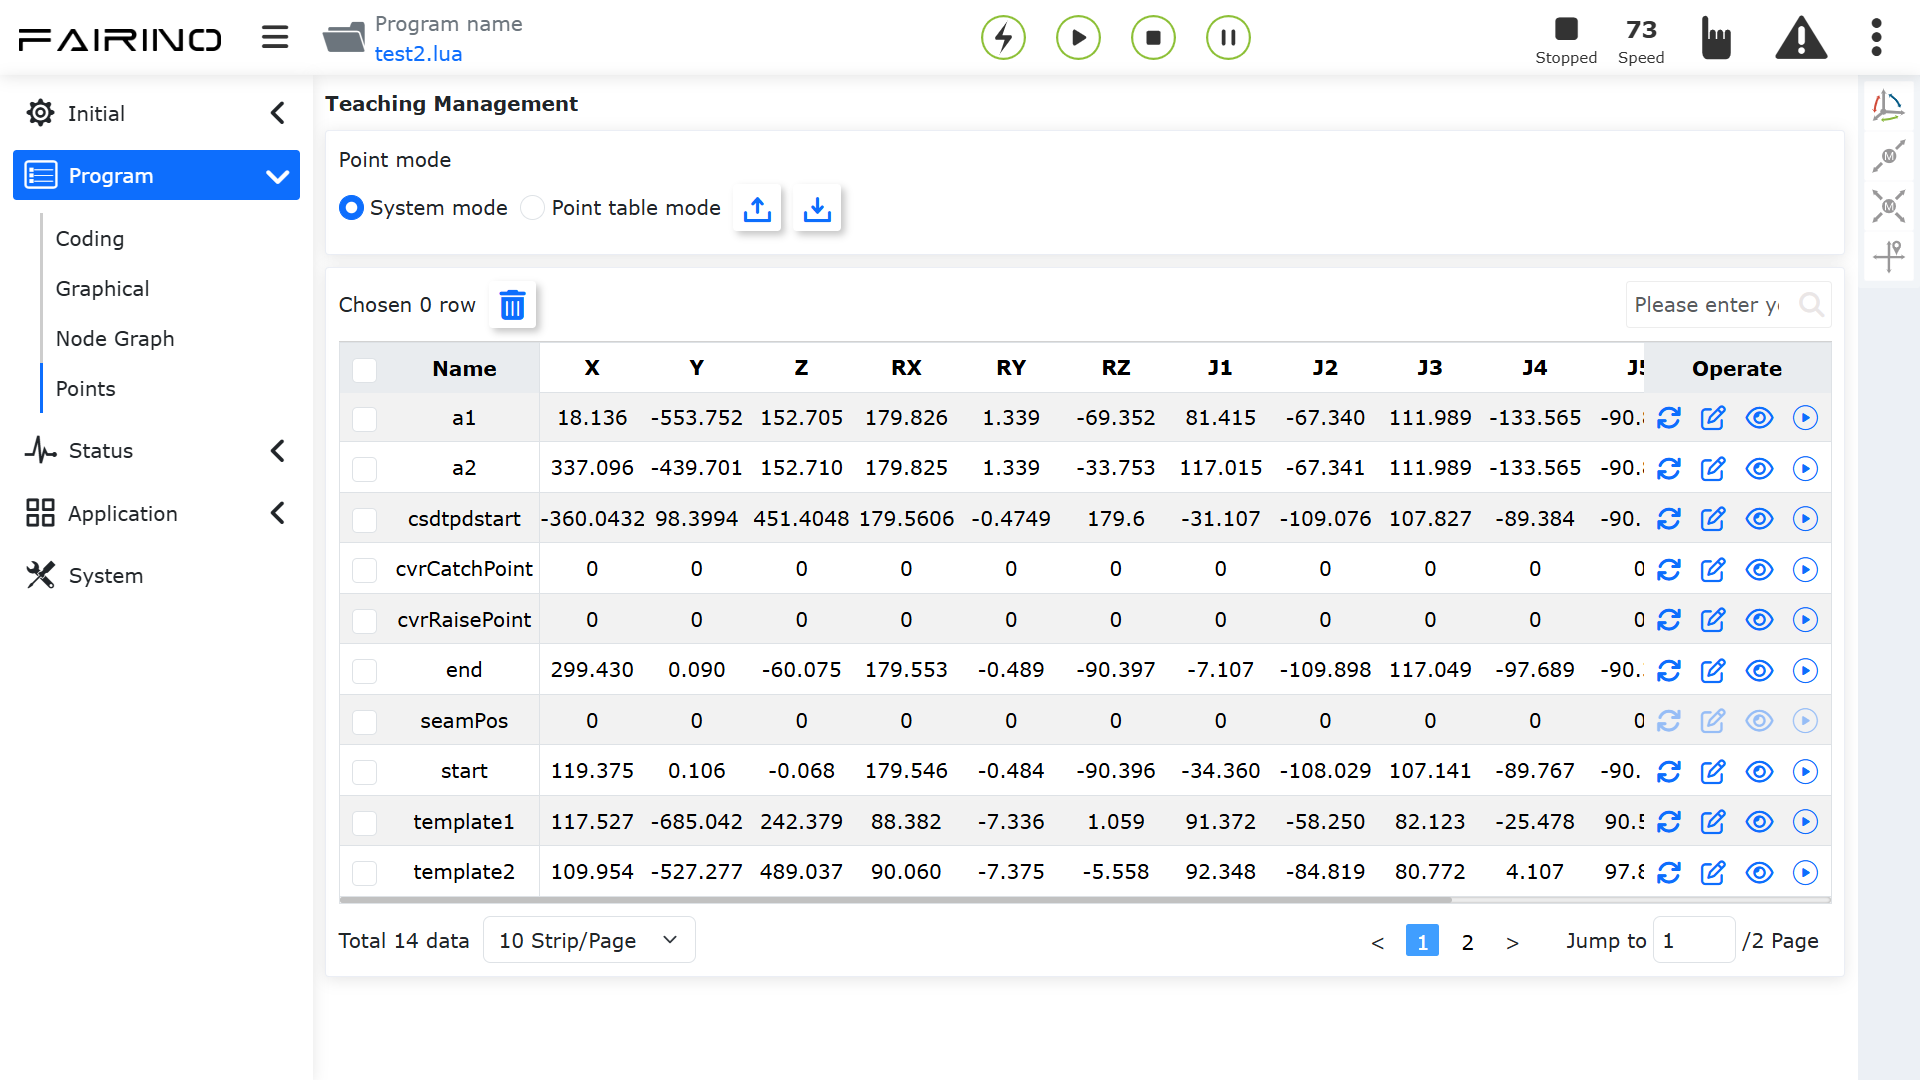
Figure 12.1-1 Teaching Management Interface - System Mode
Point Table Mode: Supports “adding, applying, renaming, deleting, importing, exporting” point tables, and “deleting, modifying, viewing, and overwriting” point content within a point table, as well as single-step movement to teaching points.
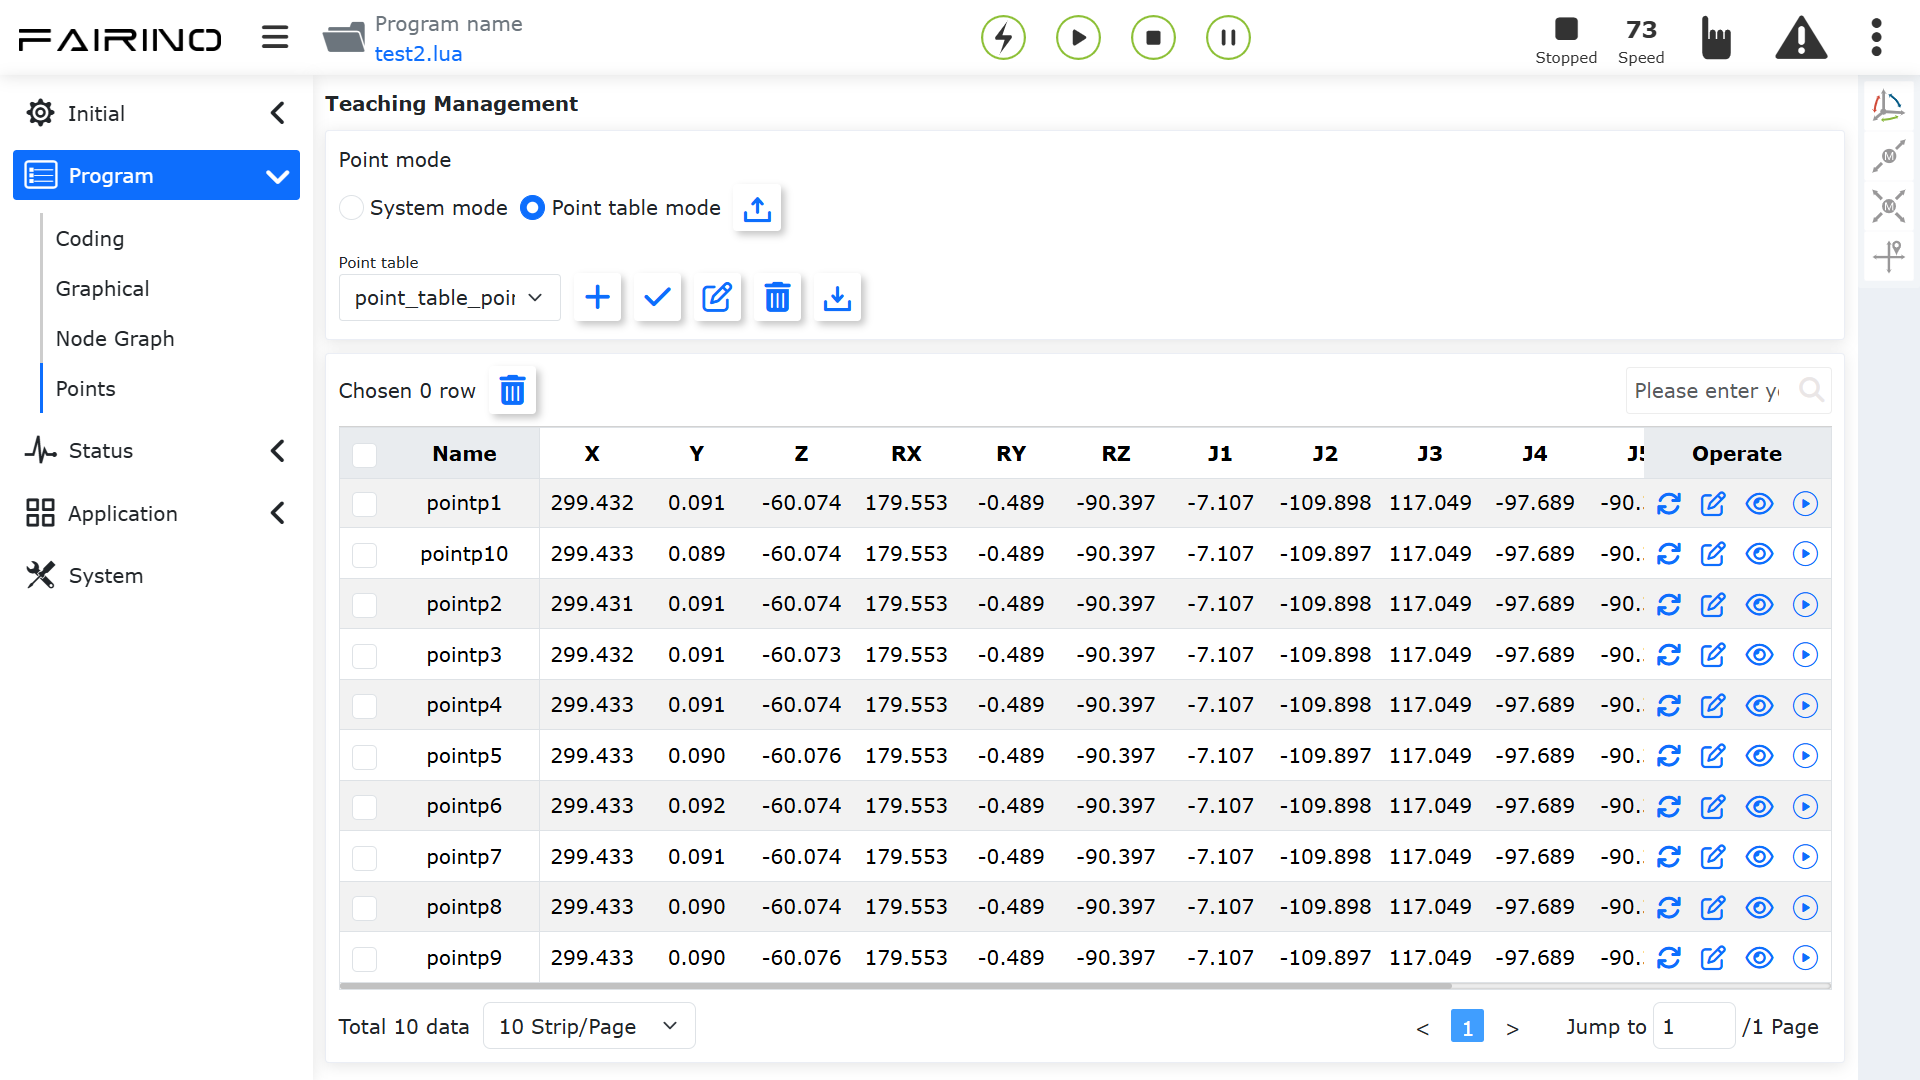
Figure 12.1-2 Teaching Management Interface - Point Table Mode
The top right corner of the Teaching Management interface displays the robot body operation bar. Users can move the robot body on this interface and then perform data overwrite operations for teaching points.
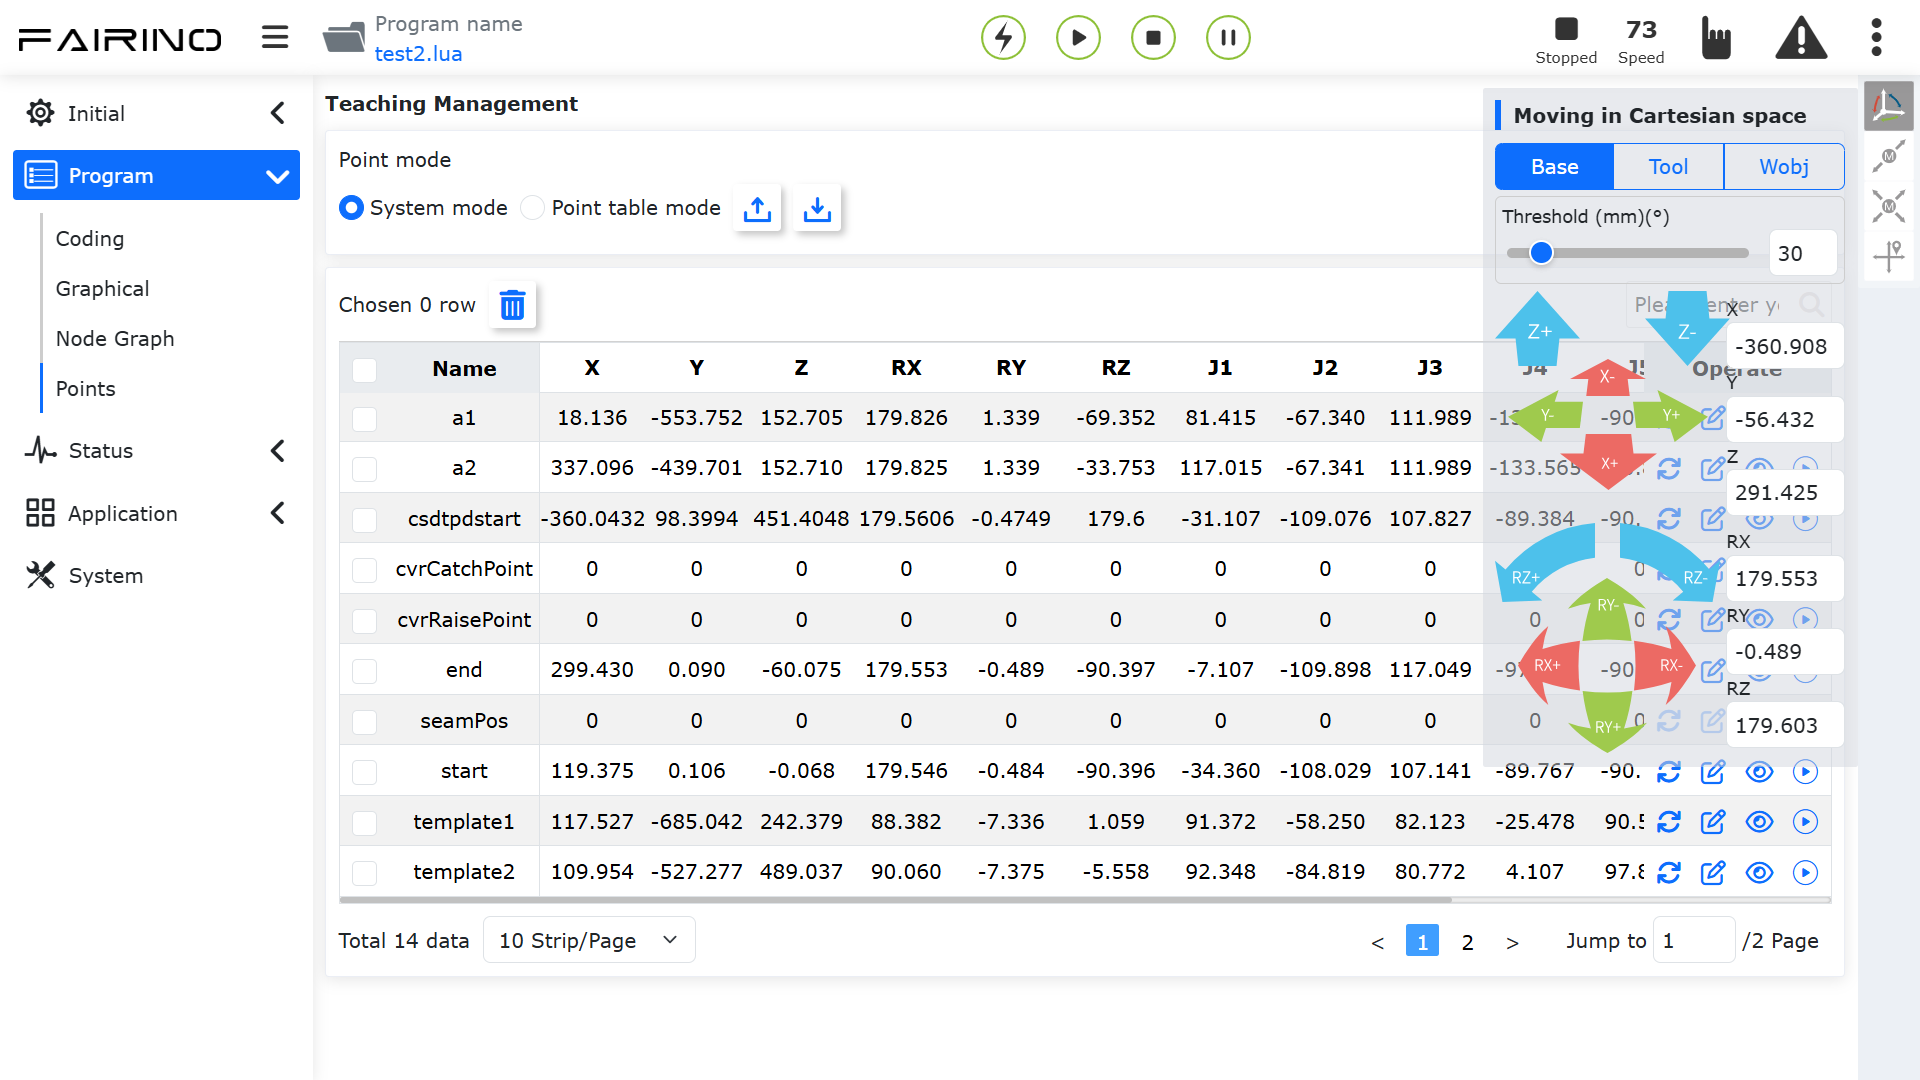
Figure 12.1-3 Teaching Management Interface - Robot Body Operation Bar
You can enter a teaching point name in the top right corner of the teaching point table data to search; Click on the teaching point name in the teaching point table data to enter edit mode, input the modified name, and click anywhere outside the teaching point name to complete the modification.
Note

Name: Import Button
Function: Import teaching point file
Note

Name: Export Button
Function: Export teaching point file
Note

Name: Delete Button
Function: After selecting one/multiple teaching points, click the “Delete” button above the table, the prompt “Please click the delete button again to confirm deletion” appears. Click again to delete the point information;
Note

Name: Overwrite Point Button
Function: Click to overwrite the teaching point with the robot’s current point data, and select “Whether to sync the teaching program” in the pop-up window
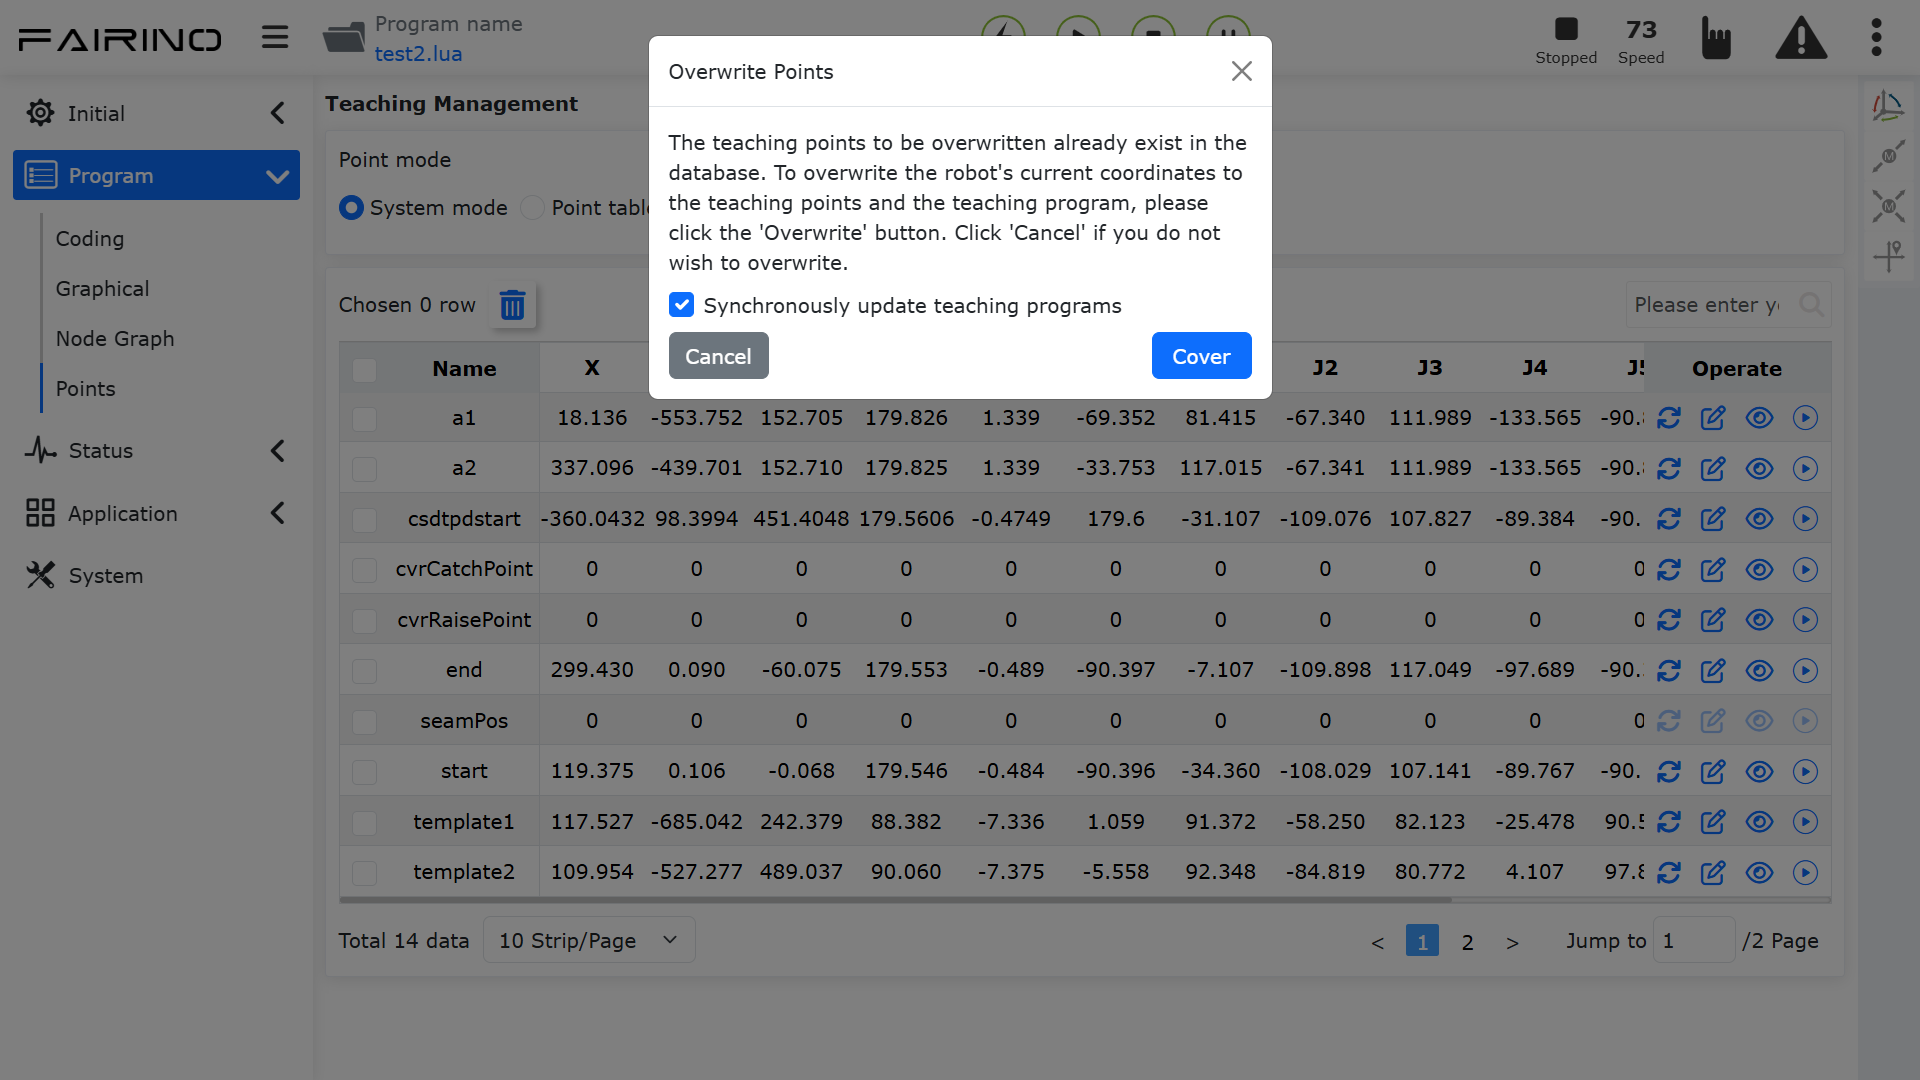
Figure 12.1-4 Overwrite Teaching Point
Note

Name: Edit Button
Function: Click to confirm modification of the teaching point’s x, y, z, rx, ry, rz, and v values
Important
The modified values for the teaching point’s x, y, z, rx, ry, rz should not exceed the robot’s working range.
Note

Name: Details Button
Function: Click to view teaching point details
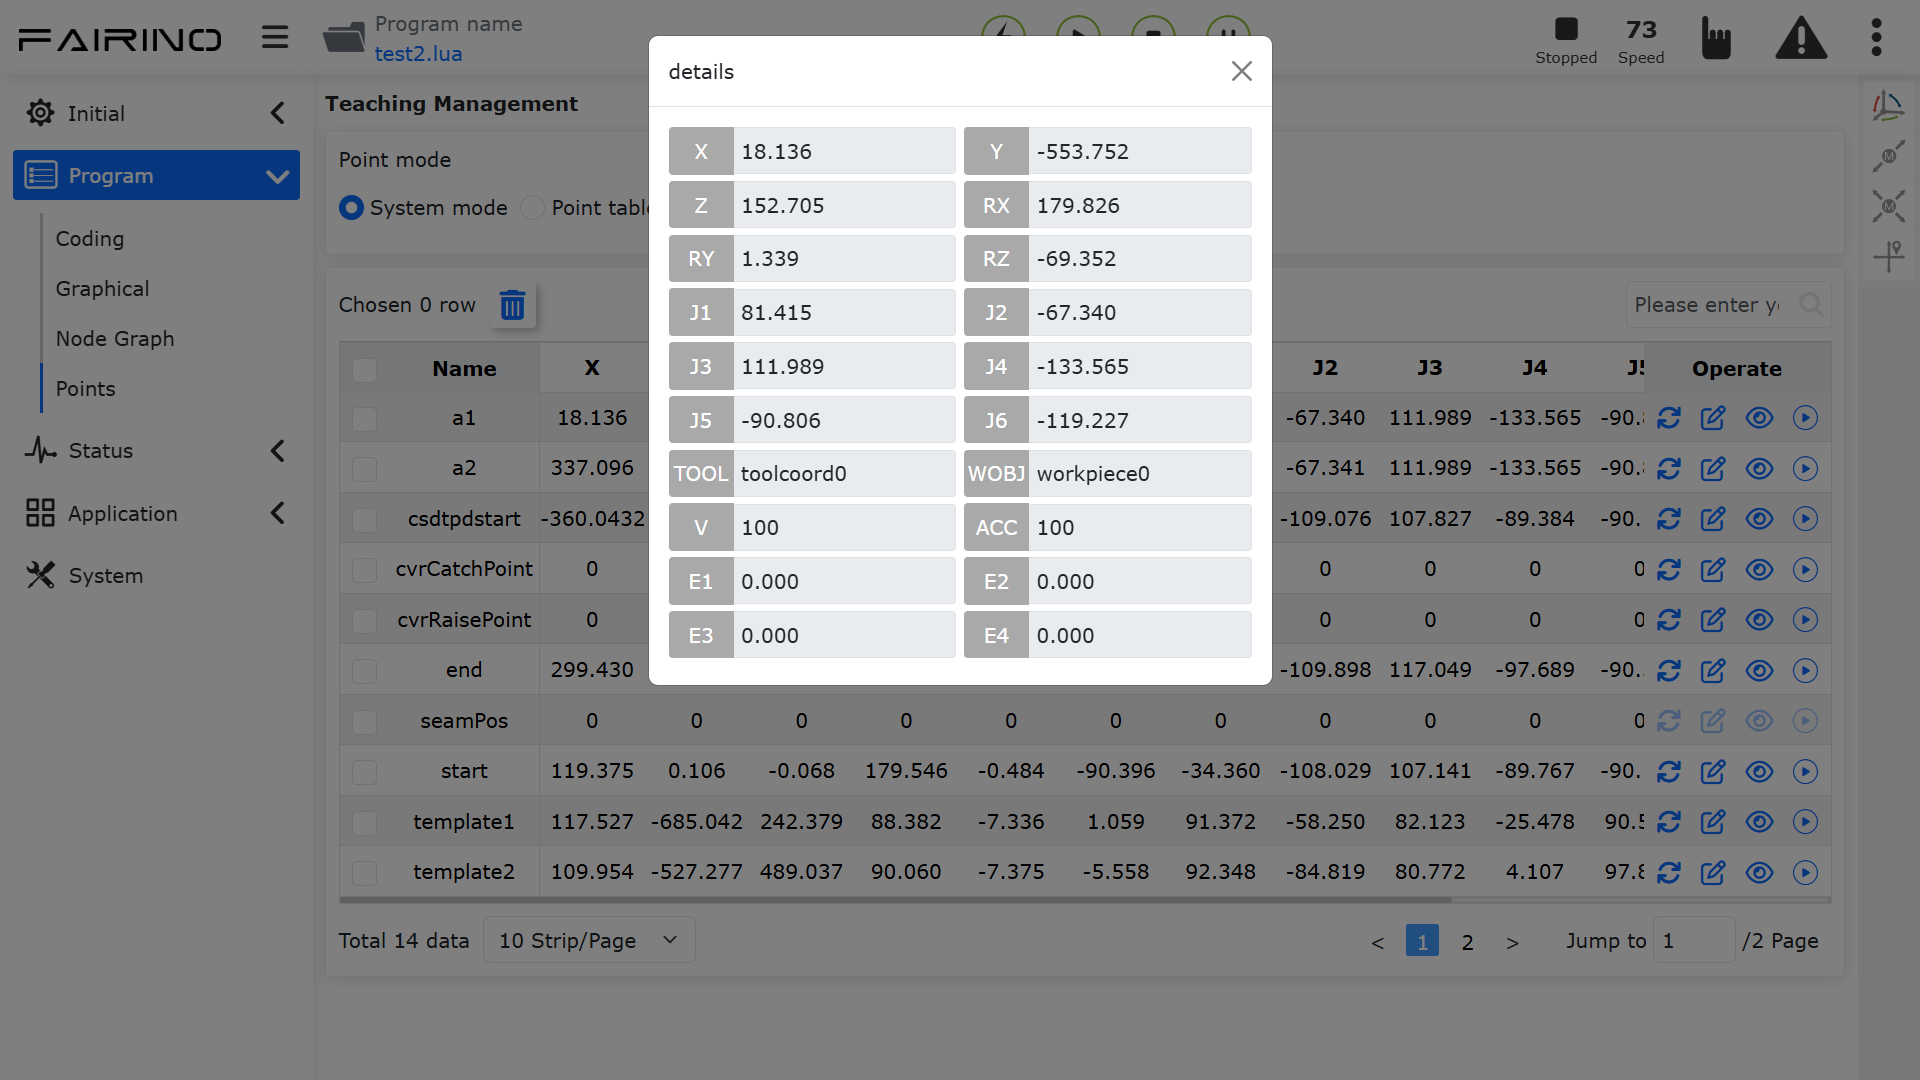
Figure 12.1-5 Teaching Point Details
Note

Name: Start Run Button
Function: Click to select the method for single-point operation to move the robot to the position of this point; Select PTP for Point-to-Point motion, select Lin for Linear motion.
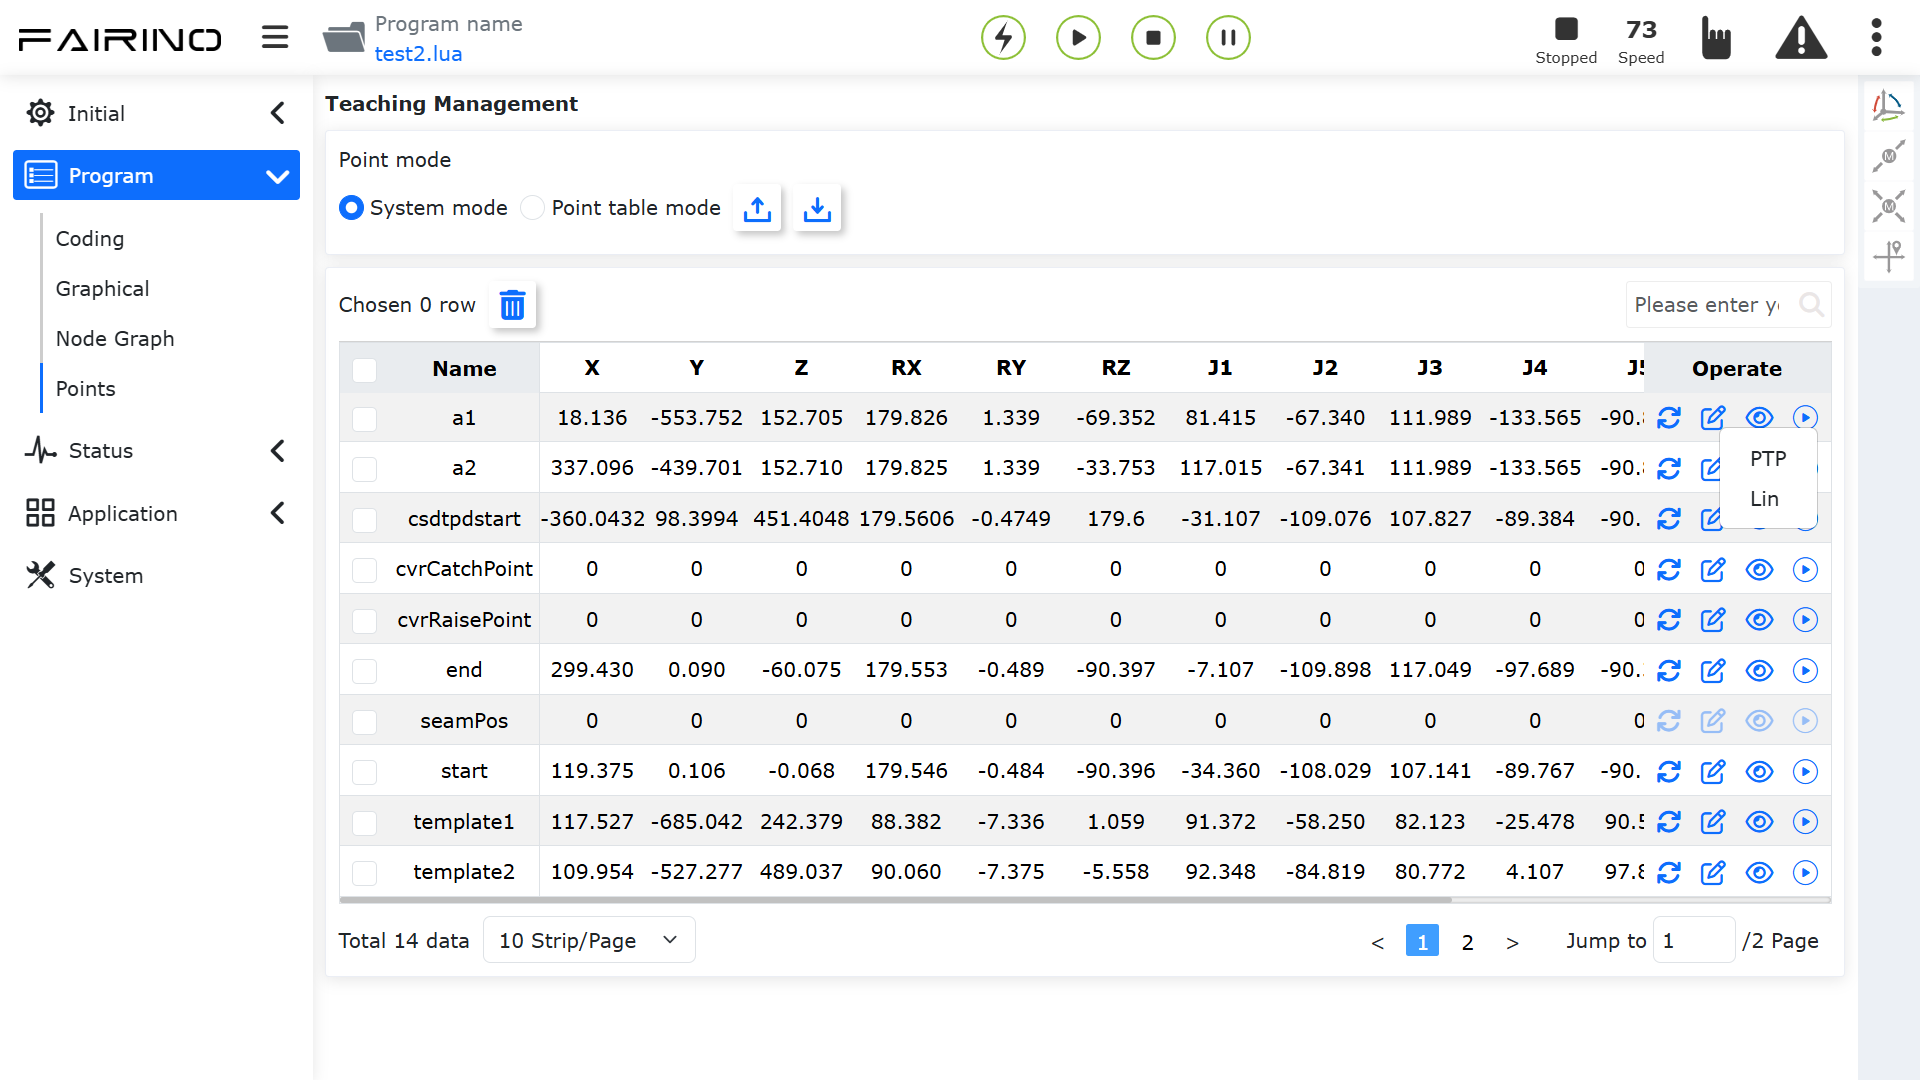
Figure 12.1-6 Run Teaching Point